
YSC Blog

Galvanic corrosion
23 April, 2017

Galvanic corrosion does not always occur below the waterline and can often be found on aluminium masts and booms that have stainless steel fittings attached to them.
In the example above a stainless steel kicker slider has been riveted to the boom but the insulation between the dissimilar metals has failed or was never there in the first place. This becomes far worse in a humid, salty environment and the damage can often be underneath the component where you can’t see the extent of the damage.
When galvanic corrosion occurs the aluminium becomes powdery and crumbles in the hand. This makes the material weak and under load the area can fail resulting in the components pulling out from the mast.
To prevent or at least reduce this the metals should be insulated from each other with an insulating compound or the component can be lacquered before being mounted. This includes the monel rivets going through the aluminium.
Always check your mast fittings for signs of corrosion and if in any doubt get a rigger to remove the components to check the condition of the aluminium underneath
Hose clip corrosion
7 April, 2017
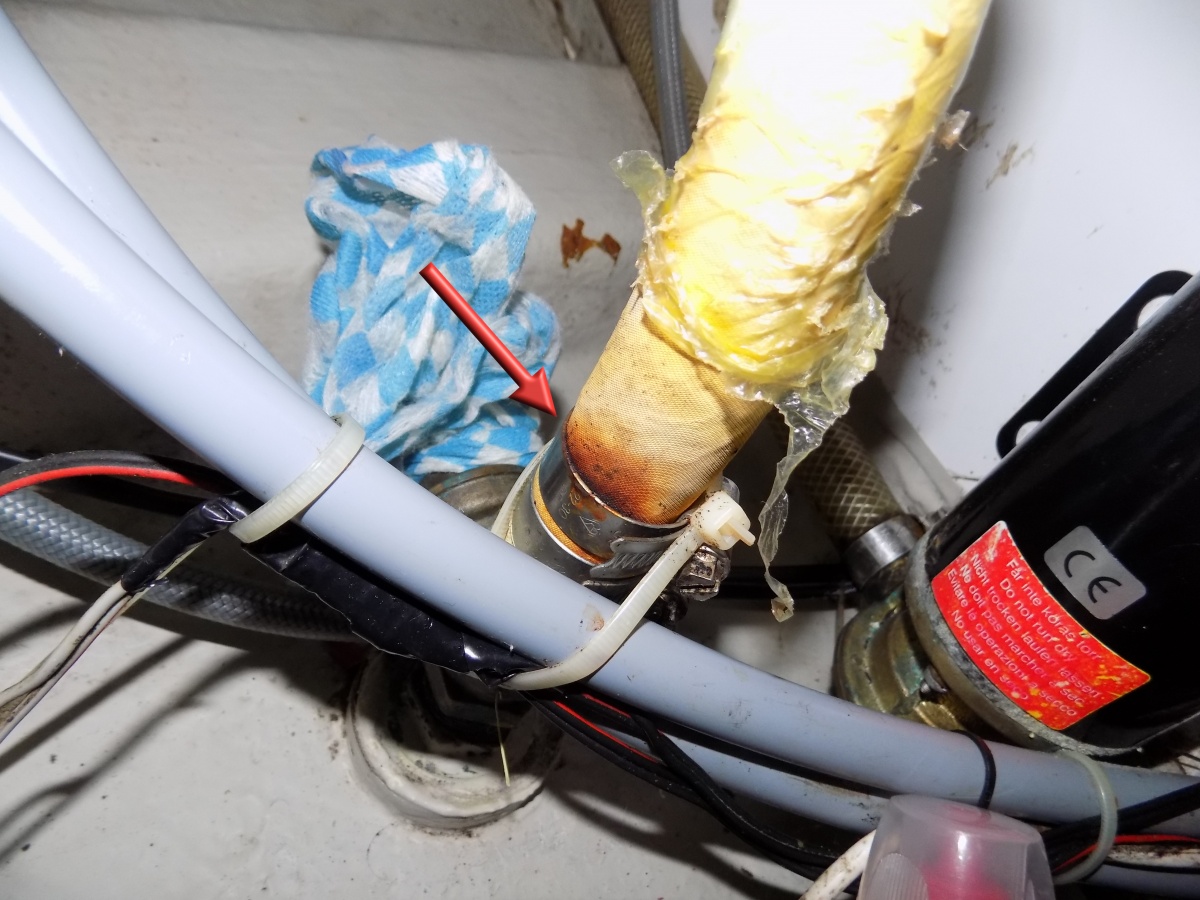
Stainless steel hose clips on hose tails are fit and forget, right? Sadly not.
The problem with stainless steel is that it is only stainless in the presence of oxygen. This is because an oxide layer forms on the surface of the steel and this is what protects it from corrosion. If you remove the oxygen then the oxide layer cannot form and the stainless steel is about as corrosion resistant as mild steel.
When hose clips are clamped tight onto hose tails the underside is no longer in the presence of oxygen and the stainless steel can start to corrode. The trouble is, its not always obvious like the picture above. Normally the only way you can tell is by removing the hose clip and looking at the underside. In severe cases, gently tapping the clip can cause it break open.
Regularly inspect your hose clips and slacken one off at a time to have look at the underside.
As an aside, sometimes I find hose clips neatly lined up with the screw heads next to each other as in the above picture. This is not the correct way, the heads should be opposite each other to get a better seal on the tail.
Stanchion bases
31 March, 2017
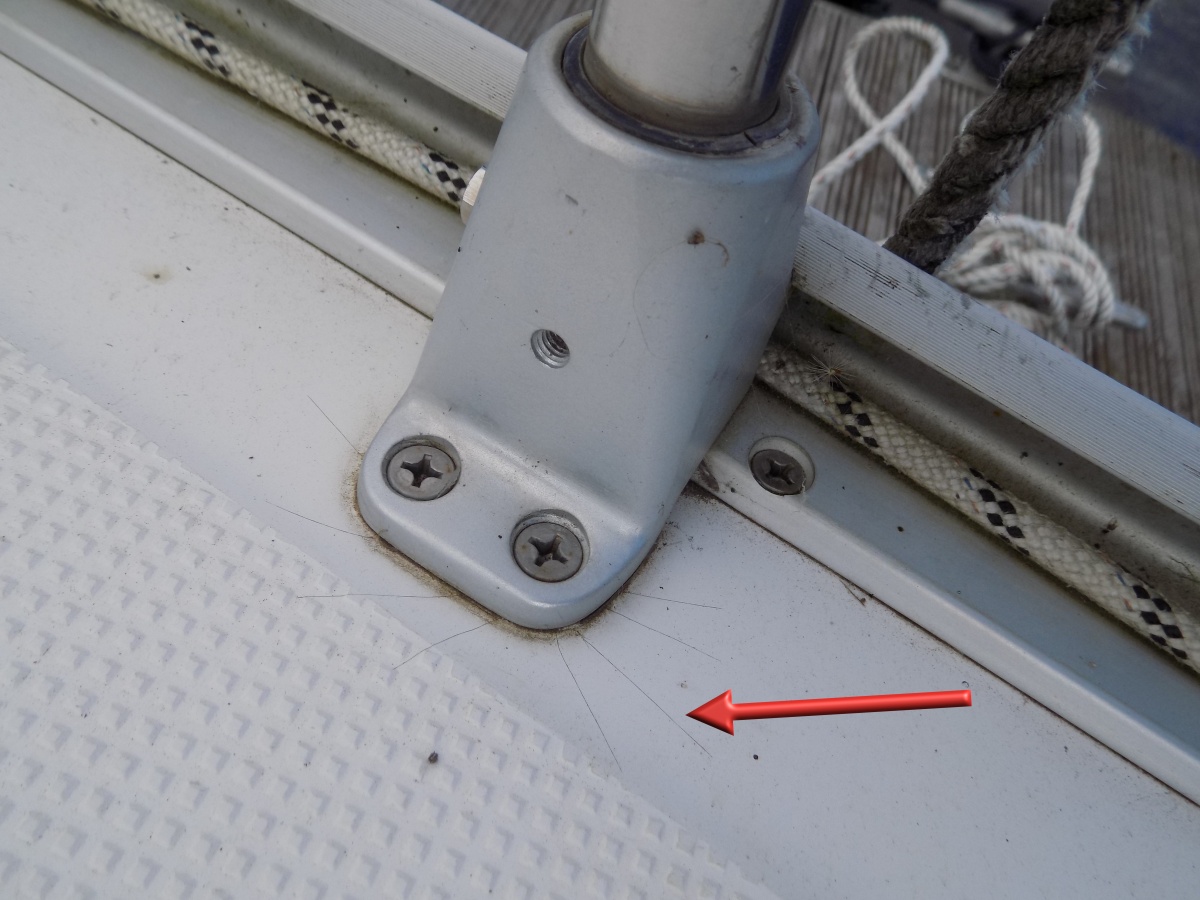
Often I find stress cracks to the gelcoat of yacht decks around the bases of stanchions. Whilst they are not normally structural they do indicate that high loads have been applied to the stanchions and caused the deck to flex more than the gelcoat can tolerate.
The cause is normally crew members using the stanchions to pull themselves up from the pontoon to board the vessel. The length of the stanchion is long and creates huge leverage forces against the all too small backing pad on the stanchion base.
The stress cracks can be repaired easily enough but its much easier to prevent the crew from using the stanchions as levers in the first place. Use the shrouds to pull yourself on deck. The fittings here are much stronger and will not crack the gelcoat. Remember the stanchions are to support the guard rails and designed to prevent you falling overboard at sea not for pulling yourself onboard in harbour.
Ideally the backing pads should be larger to help spread the loads and make the structure stronger. Unfortunately removing the linings and panels internally to gain access can be a larger job than fitting larger backing pads so often doesn't get done.
Lastly, don't forget to fit and check the retaining grub screw or split pin to secure the stanchion post to the base plate, it's missing in the image above.
Propeller nut fastening
26 March, 2017
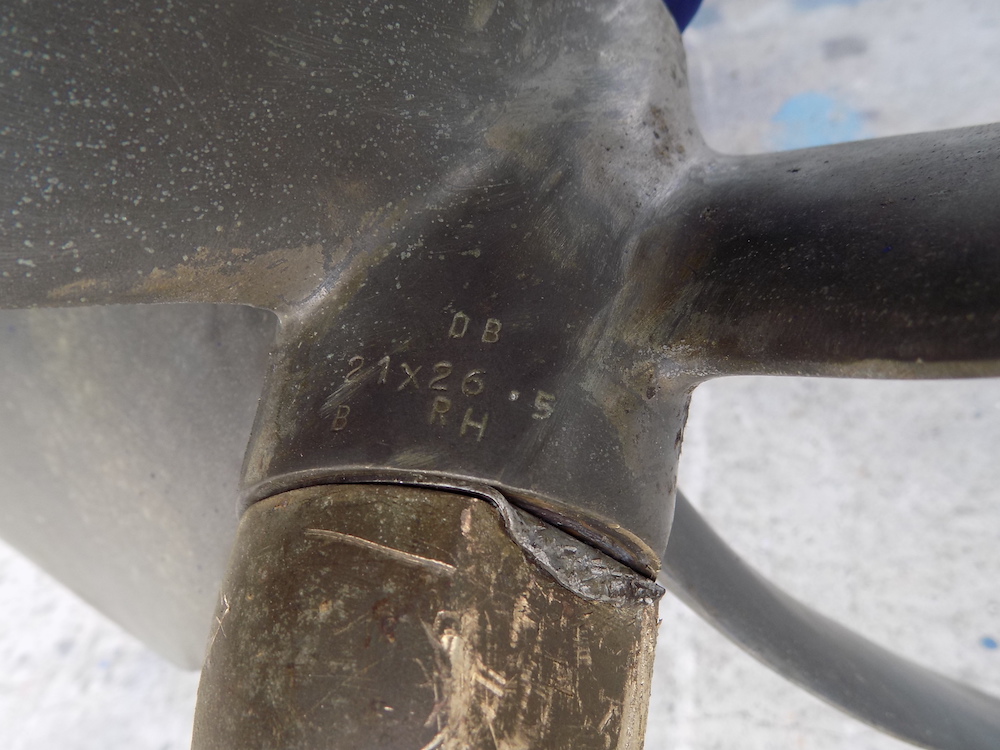
The end of the prop shaft is normally tapered and has a keyway in it as well to transmit the torque from the shaft to the propeller. Retaining the propeller on the shaft is done by lock nut.
The lock nut can occasionally come loose when the shaft rotates in the opposite direction to the thread. This can result in the loss of an expensive propeller and all drive!
There are many different ways of securing the propeller nut including; castellated nuts with split pins; drilled nut with split pin; cone nut with lock bolt; a tab washer bent over or; locks nuts.
Lock nuts are not so common in the UK but its worth noting that when fitted, the half nut (the thinner nut) should be fitted first with the full nut last. This seems counter intuitive but actually splits the load correctly between the two nuts.
Each method has its advantages but should never be overlooked when refitting a propeller and should always be checked when the vessel is lifted for any maintenance. Also check for play in the keyway by turning the prop by hand.
Beware of chafe
19 March, 2017
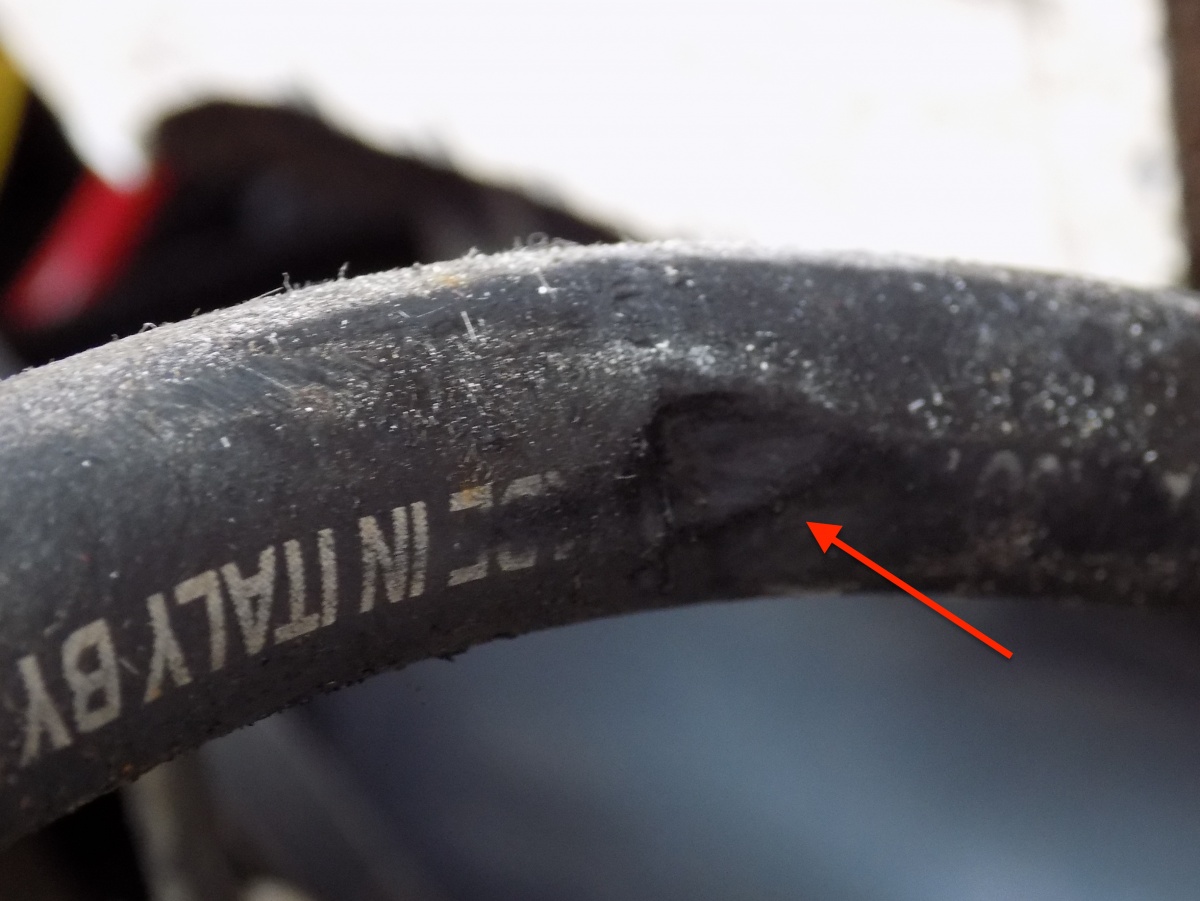
Chafe is well known as a problem for running rigging and sails but it can also affect other parts of a vessel. The photo above shows a fuel hose that was resting on a cutout through a bulkhead in the engine space. As the engine vibrated during normal running the hose gently chafed away unseen.
This one I picked up on an insurance survey and was only evident when lifting the hose to inspect the underside. The owners had completely missed it and were preparing for an offshore passage. Had the line chafed through it was positioned ready to leak fuel over the hot engine. On the same survey I found the exhaust hose was similarly worn through where it was sitting on top of a stud retaining the SailDrive ring.
Inspect the clamping and securing of your hoses or electrical lines to ensure they do not chafe either through engine vibration of movement when underway. Inspecting the hose and cable runs when running the engine on the berth should give a clue, if you see a hose or wire vibrating then its worth securing it with a saddle clamp or cable tie to prevent it wearing through and spilling its contents or shorting a circuit. Placing sheathing around the hose can help but doesn't stop the chafe, it only delays it.